Google Data Studio is an extremely powerful reporting tool for SEOs to report on organic traffic performance and performance towards goals. It can provide extra layers of analysis and insights, but it can take time to identify these types of findings.
While there are some features of Google Data Studio (GDS) that are easy to incorporate into your SEO dashboards, there are a few GDS tricks that you can use to save time on SEO reporting and analysis.
Use Existing Google Data Studio Templates to Save Time
The moment you log into your Google account and navigate to Google Data Studio, you’ll notice a section titled “Start with a Template.”

These templates are a great start to save you from building a report from scratch. There are four main templates that all SEOs should take advantage of since they correspond to four major platforms that we all potentially work with on a regular basis:
- Google Analytics
- Google Search Console
- Google Ads
- YouTube Analytics
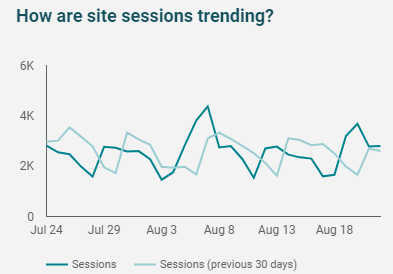
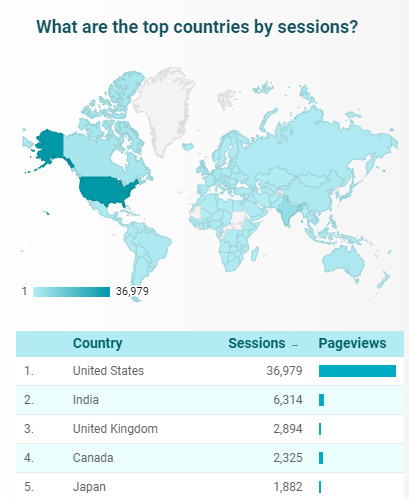
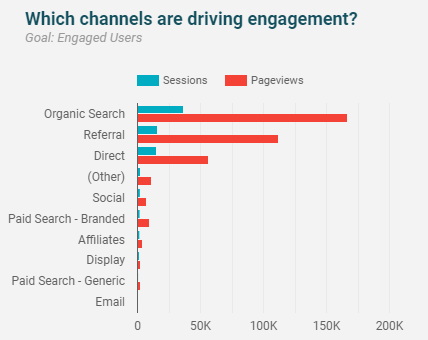
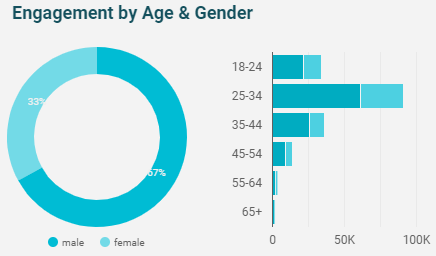
For instance, the Acme Marketing template (#1 in the picture above) has visuals and charts that answer important business questions related to day-to-day SEO work such as:
How are site sessions trending in the last 30 days?
[For international-focused businesses] What are the top countries by sessions?
Which channels are driving engagement?
What is the demographic breakdown of potential customers driving engagement?
Use these templates as a starting point for your business or client and then start to add your own customizations. See more tips in our blog post here.
Use Google Data Studio Filters and Regular Expressions (RegEx) to Categorize your Google Search Console Queries
When analyzing a website’s keyword portfolio, it’s helpful to understand a breakdown of branded vs. non-branded keyword performance. Enter, Filters and Regular Expressions (Regex).
Let’s start with an example of what the final version can look like:
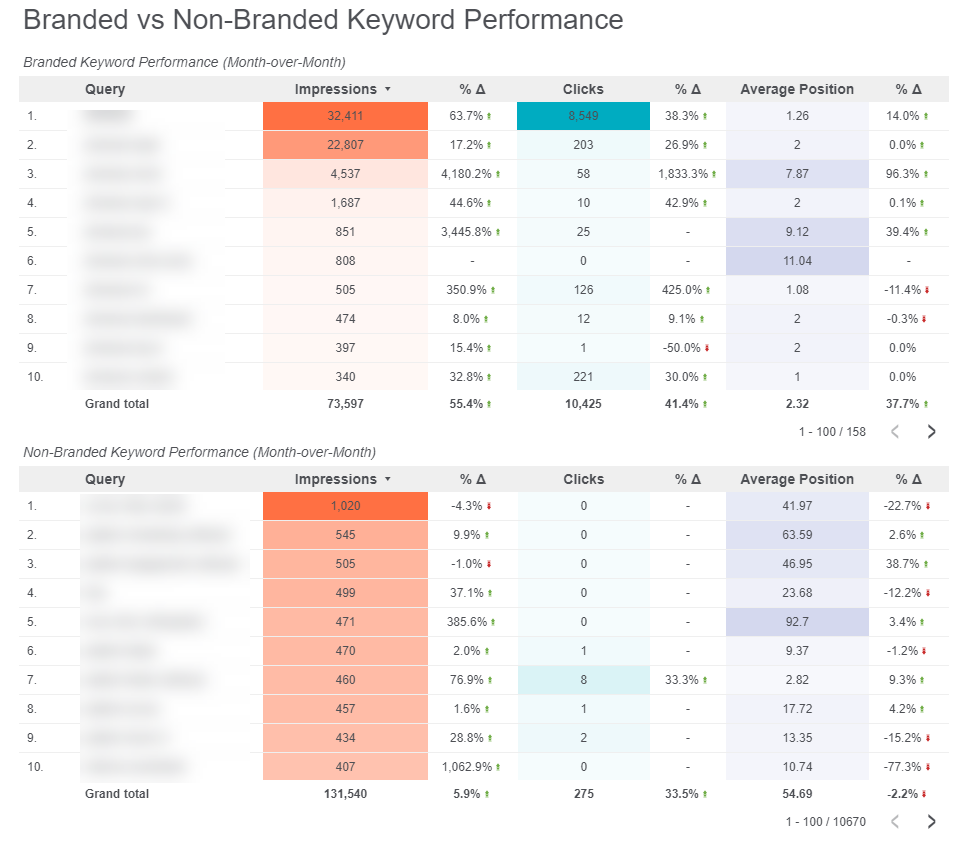
So how do we get there?
- First things first, make sure you have connected your Google Search Console account to the GDS report
- On a new slide or page, create two Tables with Heatmaps
Table #1 will be for Branded queries and Table #2 will be for Non-Branded queries.
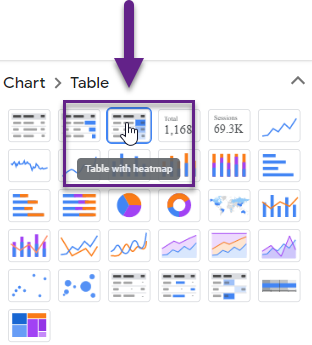
Click on one of your tables (doesn’t matter if it is Table #1 or Table #2) > Navigate to the Data tab (1) on the right-hand side > Scroll down to the bottom for Table Filter (2) > Select Add a Filter (3) > Select Create a Filter
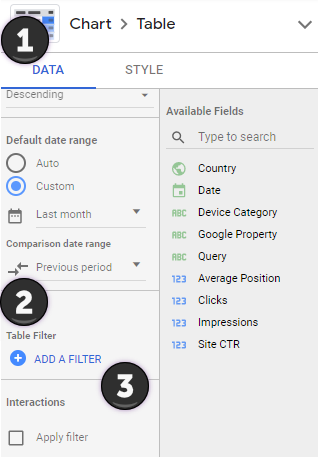
- On the next screen, create a Name for your filter (Example: GSC - Seer Interactive - Branded Queries)
- Select Include and in the “Select a Field” option, select Query (since we’re categorizing our keywords)
- After you select Query, a new drop down option will appear (Select a condition); select RegExp Contains then start entering every variation of your brand name (real brand names, misspellings, product names, important executives, etc)
- IMPORTANT: each name should be separated by a pike or “|”
- Example: seer interactive|seer|ser interactive|wil reynolds

Click Save then ensure that the filter you just created is now an active Table Filter
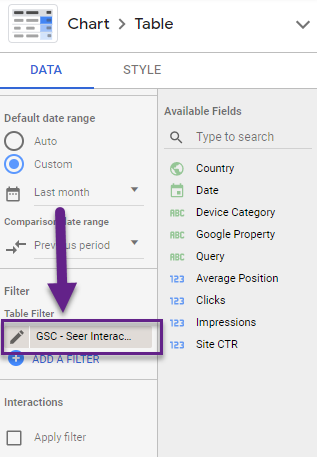
Now to get a non-branded filter, just follow the same steps EXCEPT, instead of selecting Include, we’re going to select Exclude, but use the same queries from our branded filter.

When you’re finished, you should have two filters that look something like this:


- After creating those filters, place one filter on a table to represent Branded queries and the other filter on a table to represent Non-branded queries
- Now you can bring in the metrics you’d like to analyze (Impressions, Clicks, Average Position, etc)
Use the Treemap Feature as an Interactive, Horizontal Filter
Note: For a more detailed explanation of this tip, read Mehdi Oudjida’s piece on horizontal filters; Mehdi was the first person to utilize a treemap in this way within GDS and has some great tutorials on his site!
To try this tip, make sure you have Google Analytics connected to your Google Data Studio report.
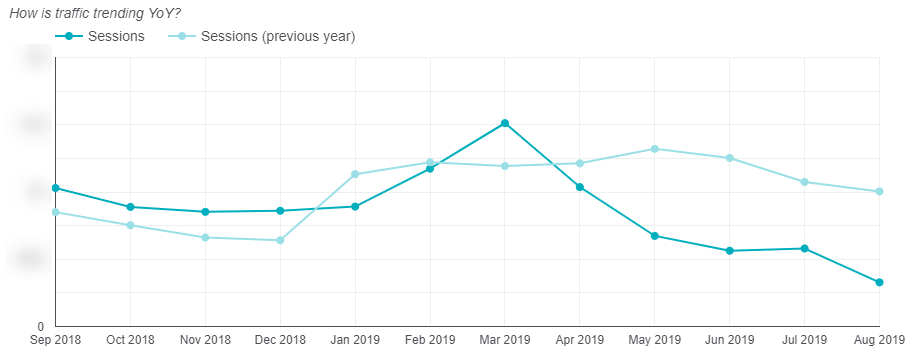
Let’s say you have a line chart that displays year-over-year traffic for the last 12 months (like the picture below), but you want to filter your chart by Default Channel Grouping (I.E. Organic, Referral, Email, Paid Search, etc).
Let’s start by selecting the Tree Map and ensuring that our dimension is set to Default Channel Grouping.
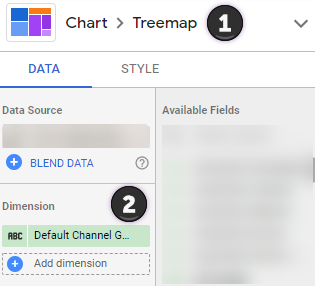
In the data tab:
- Select your dimension (Default Channel Grouping for our example)
- Create a Chart Calculated Metric
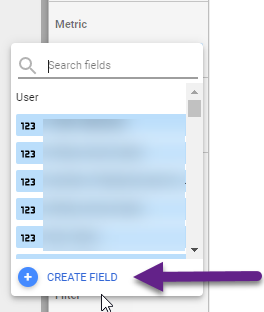
Title it "One" and use the formula: 1+0 then click "Apply."
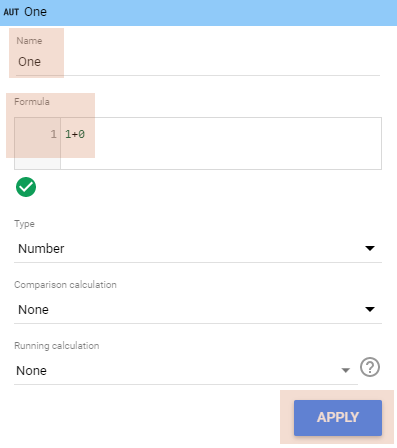
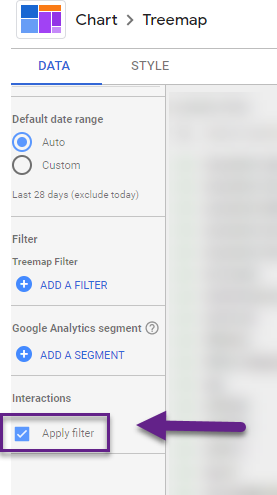
IMPORTANT: Check "apply filter" option at the bottom of the "Data" tab.
While selecting the Treemap and under the "Style" Tab:
- Update your Treemap’s background color to align with your brand colors
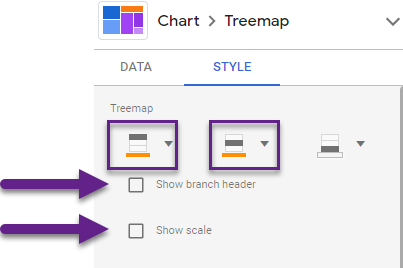
- Turn off branch header and scale bar
- “Do not show” the chart header
- Update the text size and color, if you’d like
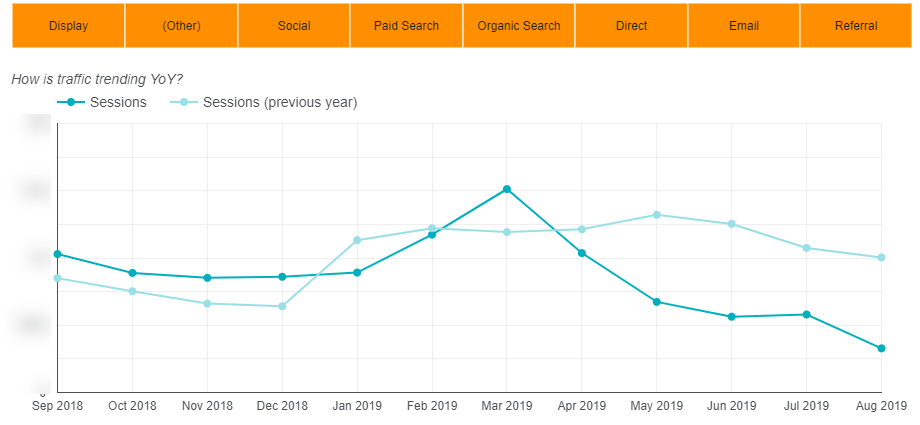
The final version should look something like this:
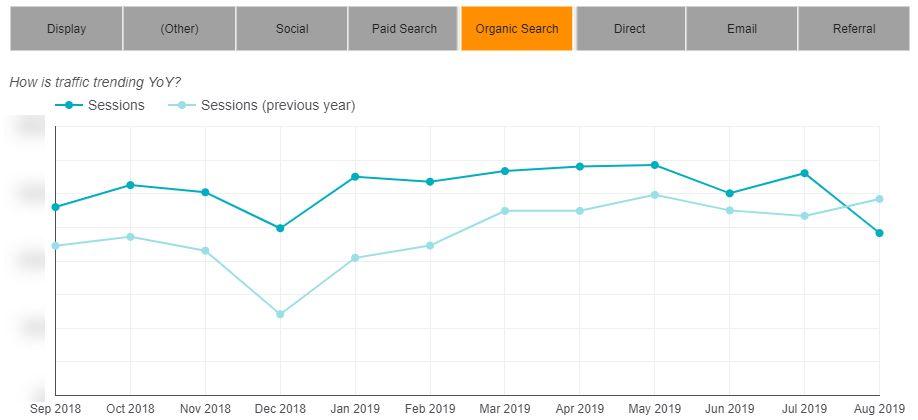
Now you can navigate to View Mode, simply select the Default Channel Grouping you’d like to filter in your line chart (pictured below is a filter for the Organic Channel) and the visual will update! This will also update any other visuals, charts, or scorecards on the GDS slide.
Google Data Studio for SEO Reporting
Google Data Studio is a powerful reporting tool for SEOs, and can help you provide extra layers of analysis and insights.
By using the provided pre-built templates, we have a jumping off point that gives us more time to analyze and provide recommendations for our business or client.
By breaking down our Google Search Console queries by Brand vs Nonbrand, we can start to monitor our branded queries for any sudden drops in brand presence. We can also discover untapped non-brand keyword opportunities if we notice an increase in clicks to certain priority non-brand terms that aren’t ranking on Page 1.
Finally, using the treemap feature as an interactive filter for our reporting lets us quickly analyze multiple channels of data in seconds; giving us more time for identifying opportunities or concerning trends.
Learn More Google Data Studio Tips and Tricks
Learn more about GDS best practices and let us know about your own experience with Google Data Studio.


