Like the name implies, scroll depth tracking is a method of tracking how users scroll throughout your site.
Scroll tracking can be applicable to almost every site, and provides insight into the non-interaction behavior of users on your site. In other words, it’s a way to understand how users move throughout your site, even if they don’t click anything.
Why Track Scrolling Behavior?
Scroll depth tracking allows you to easily get insight into the scrolling behavior of users on your site, how users are digesting your content, and overlying trends of your site’s user experience. Scroll depth tracking can also validate other metrics, such as bounce rate or conversion rate, to give your analysis another dimension.
How Do You Track Scroll Depth in GTM?
With the native Scroll Depth variable in Google Tag Manager (GTM), implementing scroll tracking on your site is as easy as ever.
Not sure what GTM is? Check this out!
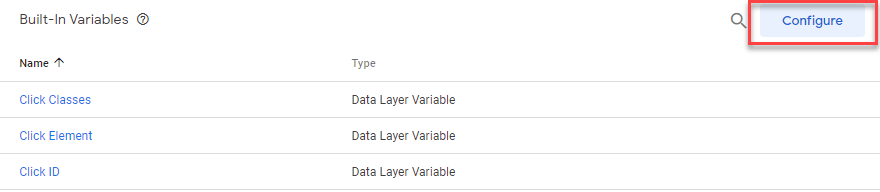
Step 1: Open Google Tag Manager and ensure that the built-in scrolling variables are configured.
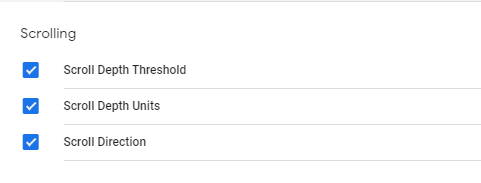
Navigate to ‘Variables’ and configure the built-in scrolling variables.
Scroll Depth Threshold is the numeric value that determines when the trigger will fire. The scroll depth threshold can be defined by a percentage or pixels (considered the Scroll Depth Units). Scroll Direction can be set to horizontal or vertical page scroll, and works with scroll depth units to cause the trigger to fire.
While horizontal scrolling is one of web design’s biggest faux-paus, a horizontal scrolling site can be very visually appealing when executed correctly.
Have you ever implemented horizontal scroll tracking? If so, leave us a comment! We’d love to hear your use case for implementing horizontal tracking.
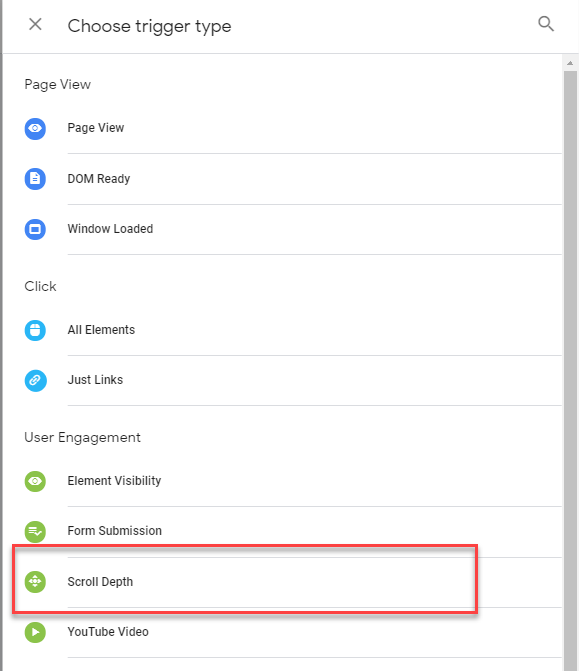
Step 2: Configure the 'Scroll Depth' Trigger
To set up the scroll depth trigger, click ‘New’ in the Triggers window and select “Scroll Depth” for Trigger Type.
Choose vertical or horizontal (or both) for scroll direction, and determine the scroll depth threshold and units.
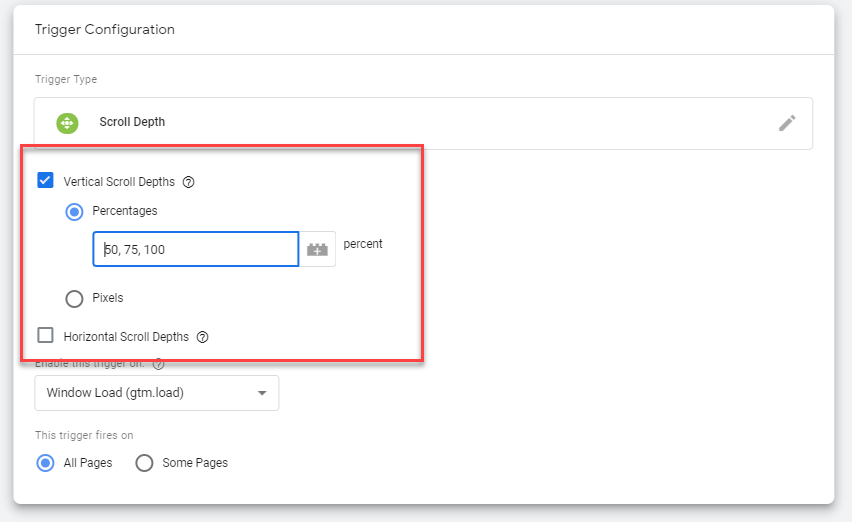
While pixels help to make the trigger more precise, it is hard to pinpoint the perfect number due to differences in screen sizes across devices. While percentages are not completely infallible, it helps to give a more subjective view of scrolling behavior across devices.
 In the example above, 50%, 75%, and 100% were chosen to indicate users who scrolled at least halfway down the page, users who almost made it to the bottom, and users who viewed the entire page.
Not all sites are created equal, therefore not all sites would benefit from the same percentage thresholds. For example, if your site has a relatively large footer with insignificant information, tracking 90% may be a better indicator of a full scroll than 100%.
You also may want the trigger to fire on certain pages, which can be configured by choosing ‘Some Pages’:

Selecting only some pages can be a strategic move if you’re concerned about hit limit in GA, as implementing scroll tracking to fire multiple times on all pages can drastically increase the number of events flowing into GA.
Step 3: Create a Google Analytics Tag for the Trigger
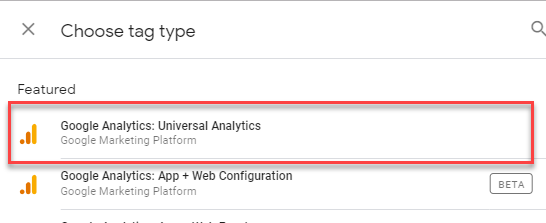
Now that you have the trigger ready, it’s time to build out a tag. After navigating to the Tags pane and selecting ‘New’, create a Universal Analytics tag.
In the tag configuration, make sure to select ‘Event’ in the drop-down menu for Track Type and add in an appropriate category, action and label.
Have a Web + App property? Set up scroll tracking using the Google Analytics: App + Web Event tag (currently in beta).
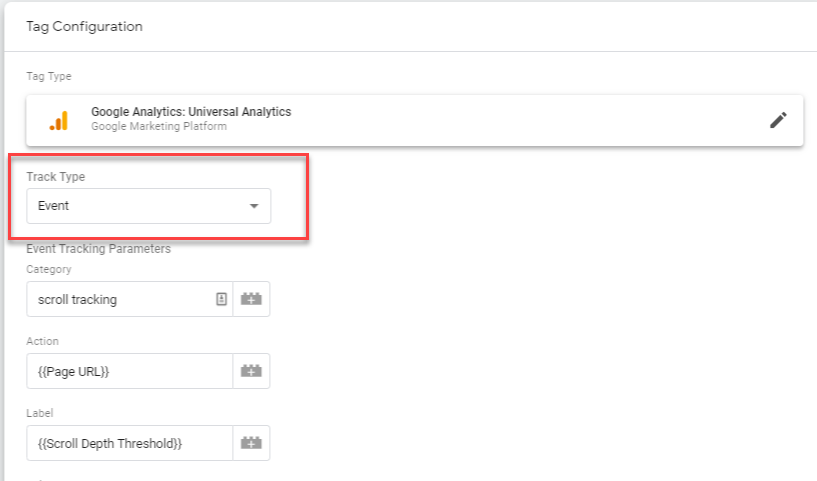
In this instance, Page URL was selected as the action so that the appropriate page can be tied back to the scrolling event that was performed. Scroll Depth Threshold was selected for Label to determine the breakdown of the percentage or pixels scrolled on each page.
Setting the tag up in this manner will allow for easy organization and analysis in Google Analytics, as well as a programmatic way to turn the data into visualizations.
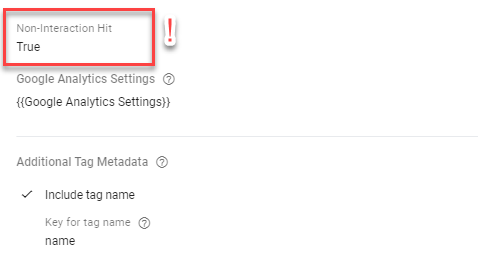
Ensure that the Non-Interaction Hit tag setting is changed to ‘True’ and is configured with the appropriate GA Property ID. If this is left to the default ‘False’, it will cause your bounce rate to artificially plummet for all pages with scroll tracking!
Lastly, add the Scroll Depth trigger to the tag configuration and you’re on your way to tracking your users’ scrolling behavior!
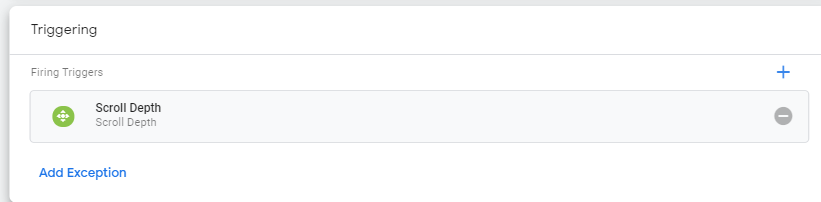
Once you’ve QA’d your tag and confirmed that all the thresholds fire appropriately, you can Publish your tag and start using the data in Google Analytics to give your analysis another dimension of user engagement.
![]()
How to View Scroll Depth in Google Analytics
Now that you have your scroll tracking tag set up, you can use that data to see how users are engaging with your site.
Your scroll tracking data will live in in the Google Analytics Behavior report under ‘Events’ and can be combined with other metrics to drive actionable insight into user behavior. For example:
- If 9,000 users visit a page but only 400 sign up for the newsletter, you might say your conversion rate is trash! However, if the sign-up field is at the bottom of the page and only 500 users scrolled all the way down the page, that’s actually a much better conversion rate when comparing number of users who saw the newsletter call-to-action to those who converted. This would indicate that users are interested in signing up, but aren’t seeing the form submission field. Therefore moving the newsletter form up on the page might yield higher conversion rates.
- Perhaps your page has a super high bounce rate; that must mean something’s wrong with the page’s ability to engage users, right? Well, not always. A high bounce rate may indicate that users are coming to your page and finding exactly what they were looking for without actually interacting with the page. Say a user searching Google for “how to implement scroll tracking” lands on this blog post and reads the entire post without clicking anything on the page. Even though they found the answer to their query, they technically count as a bounce. If scroll tracking is implemented, you can combine the data with Avg. Time on Page to determine whether or not a high bounce rate is indicative of a UX challenge or just a successful non-interaction session.
Quick Exercise for Analyzing Scroll Data
- Look at the scroll events data for the entire site, and break out the percentage of users that reach each scrolling threshold (50%, 75%, etc.).
- Pull an individual page or content grouping and look at how users scroll throughout these pages and compare those metrics to unique pageviews
- Analyze how those pages or content groupings compare to the site baseline, and identify opportunities to optimize
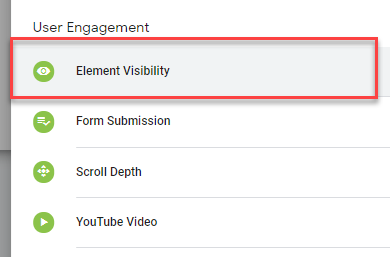
How Do You Track Element Visibility in GTM?
You can make your scroll tracking even more precise using the Element Visibility trigger in GTM.
Not all screens are created equally. If your goal is to track when a certain element on your page is viewed, Google Tag Manager provides a native Element Visibility trigger. This trigger allows you to track when a defined percentage of an element is visible in the browser’s viewport (area of a website that’s visible on a user’s screen).
You can configure the tag to fire for a specified ID or CSS selector. After adding the desired ID or CSS selector to the configuration, you’ll also be able to set the tag to fire only once a certain percentage of the element is visible in the viewport with the Minimum Percent Visible setting.
![]() Minimum Percent Visible should be used later as the Event Action. Do this by simply adding the ‘Percent Visible’ variable to the Event Action setting.
Minimum Percent Visible should be used later as the Event Action. Do this by simply adding the ‘Percent Visible’ variable to the Event Action setting.
Additionally, you can set the tag to fire only if a certain time on page is achieved, or if changes are made in the DOM. These user-defined settings makes this tag very versatile and valuable when tracking user engagement with your site’s pages.
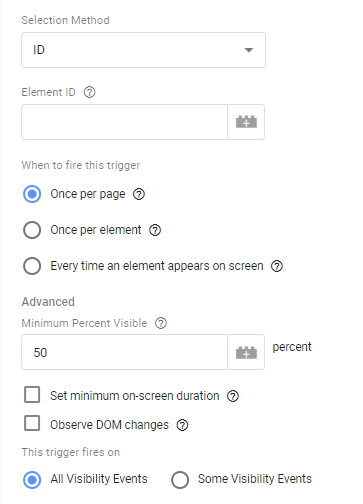
Like other popular GTM tags, adding conditions to the event trigger allows for an even more granular configuration when choosing ‘Some Visibility Events’.
Scroll tracking and element visibility tracking not only add another layer of insight to your analysis, but it also allows you to gain insight into how users interact with your site’s pages without actually interacting with anything.
These tags provide a quick and en masse alternative to heatmaps and other user behavior tools, and if you already have GTM set-up, you’re only a couple of clicks away from tracking how users are moving through your site. Let us know if you give this a shot in the comments and don't forget to sign up for our newsletter below!