Google Analytics provides the ability to create user accounts with different user permissions because Google recognizes that different people have different access needs. It is very important to understand how administrators can take advantage of that flexibility. For example, the marketing function can reside internally within a company or with a third-party marketing agency or can be divided between the two.
In any case, it is crucial to control user permissions because there will be some people who will ONLY read the data and others who will control what data is collected and how it is collected, as well as which users should have access.
You can imagine the nightmare resulting from everyone changing settings in Google Analytics that have lasting effects on reporting, especially if there is no method of tracking who made the changes. Messy reporting is difficult to work with and often data obtained through messy reporting is useless, as well. Therefore, it is beneficial to give full-edit access to only those users who understand the implications of configuration changes.
Although it is not difficult to implement, it is often difficult to communicate to stakeholders via email how they can grant appropriate access to their GA account. With this post, I’m hoping that you will find it easy to walk someone through the steps for creating one user with full-edit access permissions and another user with slightly more restricted access.
First, take a look at the table below as it lists the four user permissions that Google Analytics allows you to provide users according to Google.
| Access Right | Description |
| Manage Users | Can manage account users (add/delete users, assign permissions). Does not include Edit or Collaborate. |
| Edit | Includes Collaborate as well as perform administrative and report-related functions (e.g. add/edit/delete accounts, properties, views, filters, goals, etc., but not manage users), and see report data. |
| Collaborate | Includes Read & Analyze as well as collaborate on shared assets, for example, edit a dashboard or annotation. |
| Read & Analyze | Can see report and configuration data; can manipulate data within reports (e.g., filter a table, add a secondary dimension, create a segment); can create personal assets, and share them, and see shared assets. Cannot collaborate on shared assets. |
These four user permissions can be granted to a user from 3 different points; Account level, Property level, and View level. What users can do, in terms of setting up goals and creating filters, is determined by which level the access rights are granted from. For example, when setting up clients’ Google Analytics instance, Seer always needs to create filters and test them. This can be done with edit permission given only at the Account level. If Seer is given all user permissions at the Property level, new filters cannot be created.
So, let’s start with creating the user with full-edit access. This user will be called “fullaccessuser@email.com”. Full-edit access should only be given to a few people so that any mistakes can be traced back. GA does not provide an audit trail (hopefully, that might change in the future), so a log of changes will have to be maintained externally in Google Sheets, for example. It’s recommended that each person making changes list the date / time and project they had worked on in GA on this spreadsheet, as well as any changes they had made and reasons for those changes. This will help to provide an overview of the project from a “big picture” standpoint, too.
Creating a User with Full-Edit Access Permissions
- From main account page, click on “User Management” in the “Account” section.
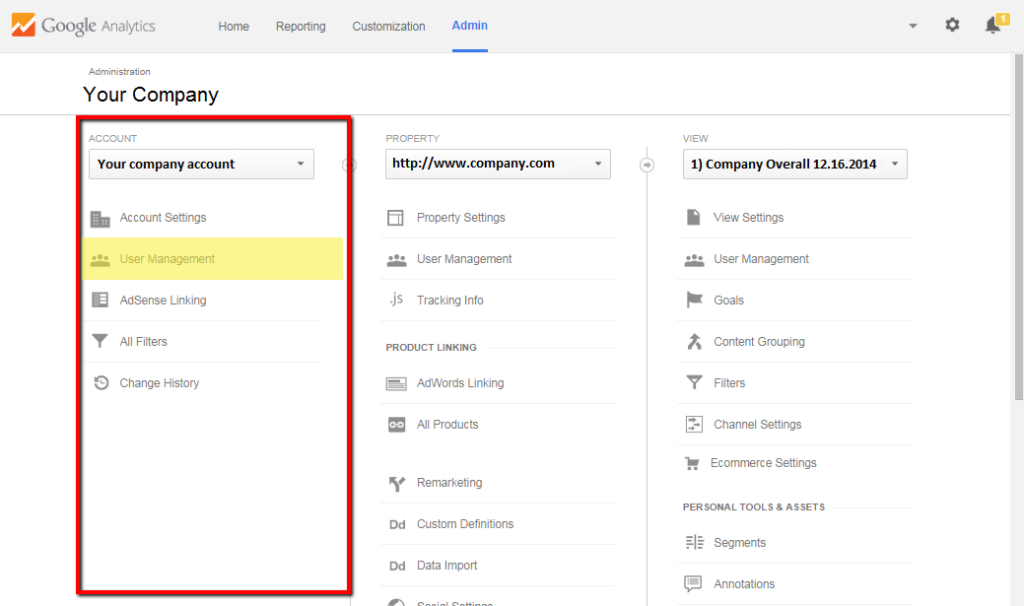
- After clicking on “User Management,” scroll down and fill in the field with the “fullaccessuser@email.com” address and click on the dropdown box next to it. Make sure you check off all boxes as displayed in the picture below and click the “Add” button.

As mentioned before, keep in mind that if this user is given all four permissions from the Property level, this user will still be slightly handicapped as this user will not be able to create custom filters.
Creating a User with Restricted Access: Collaborate Permissions
Next, let’s create a user with slightly restricted access. The restrictions you require will depend on your needs. For example, at Seer, we require having at least one user with Collaborate and Read & Analyze permissions at the Property level.
One very interesting thing to remember is that, as you move down the hierarchy, you can give more permissions, but not fewer. For example, if a user has only Read & Analyze permission at the Account level, you can give them all other permissions at the Property or View level; but if a user has Edit permission at the Account level, you cannot limit his/her permission to just Read & Analyze at the Property level.
The next user that we will create will be “collaborateuser@email.com”. Collaborate permissions allow a user to comment on dashboards that have been set up in Google Analytics and create annotations that others can refer to for understanding unusual past behavior, for example. Other users who have at least Read & Analyze permissions are able to view them and those with at least Collaborate can also provide their feedback.
- From main account page, click on User Management in the Property section.
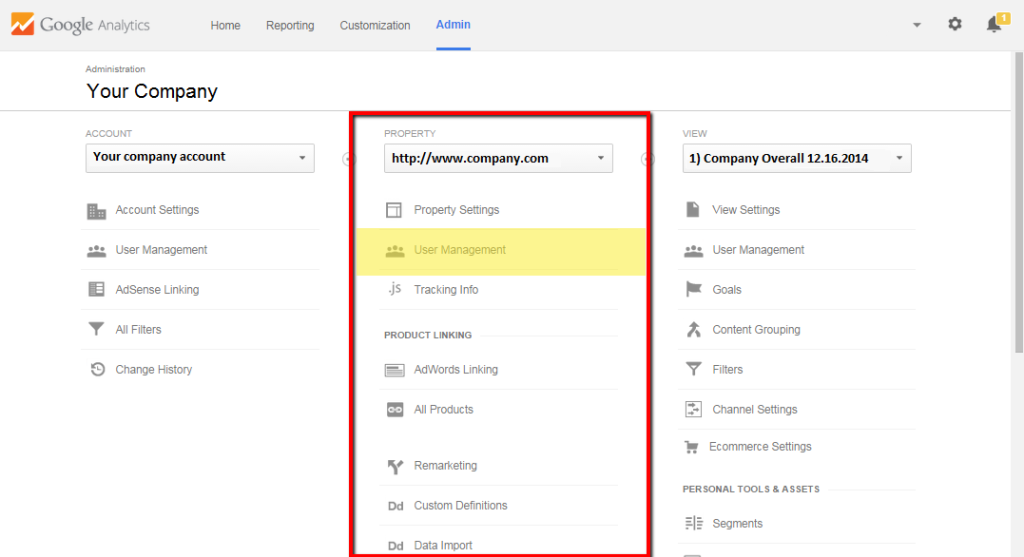
- After clicking on User Management, scroll down and fill in the field with the “collaborateuser@email.com” address and click on the dropdown box next to it. Make sure you check off only the Collaborate and Read & Analyze checkboxes and click the Add button.

And there you have it!
As a last note, if you want to delete any user, you can do that only from the Account level.