Hey there! My name's Ryan and I am another new member to the SEER team. I've learned so much since starting at SEER but I thought for my first blog post I would cover something I have some background in, WordPress. I am helping to set up SEER's upcoming blog on SEO for college students and I thought I would share the checklist I go through every time I start a new site on WordPress. If anyone's New Years resolution was to finally start blogging then hopefully this post will give you a few ideas and tips or possibly save you a headache down the road.
The great thing about WordPress is that it really does simplify every step of creating and running a site. I was in a meeting with SEER's developer Chris Le and half the time I thought he was speaking a foreign language when talking about advanced site design. I know some coding basics but thanks to WordPress and the plug-ins and themes created around it I've built more than a dozen sites ranging from your basic blog all the way to e-commerce and password protected membership sites. Although WordPress is a great CMS (Content Management System) that will simplify running your blog it doesn't mean you won't run into any issues along the way. For SEO purposes and your readers experience it's important to get your initial setup as close to "optimal" as possible. So without further ado, here is my 10 step checklist to creating your WordPress blog.
NOTE: I am not going to cover how to install WordPress. If you have a hosting company they will almost always have tutorials or customer support on installation.
1.) Layout: Draw up a layout of how you would like your site to look. Brainstorm the major categories you are going to cover. Research other blogs that you enjoy reading to help you get a feel for how you want your site to look. One big decision is whether you want to have more than one navigation bar.
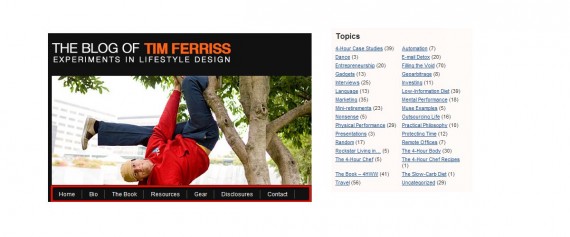
- Tim Ferriss's site Four Hour Blog covers a wide array of topics, way too many to fit across his primary navigation bar. He uses his primary navbar to cover the basics and then a site wide sidebar to cover the topics he frequently writes about.
![]()
- This navigation bar was taken from a successful affiliate site. They are using their targeted keywords across the navigation bar to maximize the link juice passed across each page. From an SEO perspective, their can be a benefit to limiting the links you have on your navigation bar and each page in general. This sites news section uses a sidebar but it is not used site wide.
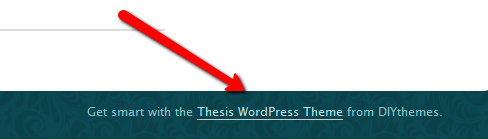
2.) Choose a theme: Many themes are available for free and some great ones are out there for purchase. If I had one piece of advice for choosing a theme it would be to keep it clean. You don't need a million widgets, images or menu bars on your pages. If you are providing educational or entertaining information that is what the readers will be there for. If you are researching other WordPress blogs while planning your design then at the bottom you can often see what theme they are using.
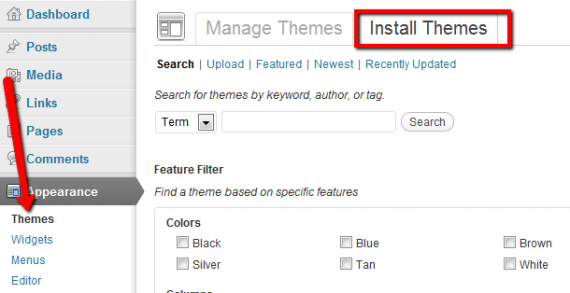
- If you just want to use one of the many free ones available then in your WordPress dashboard go: Appearance ---> Themes ---> Install Themes ---> Search
3.) Get a Logo/Header: One of the things I love the most about WordPress is outside of a theme, a logo is the only thing you have to spend extra time or money on. Unless you are great with photoshop, I recommend hiring someone from ELance or a forum to design a logo for you. I know I have gotten really nicelogos for as little as $20.00. Make sure you get the pixel specifications from your theme correct and that the logo will mesh with your sites theme and color scheme. Also tell your designer that you want at least one edit as part of the agreement.
4.) Set your permalinks structure: I've seen some debate on what the best permalink structure is but you definitely don't want to leave it on the default. Below is my recommendation but feel free to do some more research.
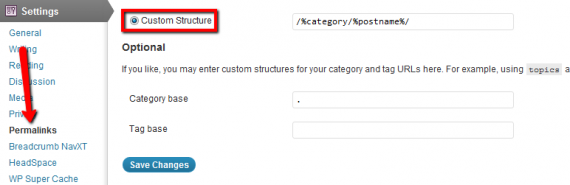
- In your dashboard go to Settings->Permalinks. Change the URL to a custom structure, and use /%category/%postname%/ as this will allow for SEO friendly URLs like yoursite.com/SEO/links/ as opposed to: yoursite.com/?p=001.
- Change the Category Base to ./ then click save. Once you do that, only the . will remain there. If you leave it as is, your SEO category URL will be yoursite.com/seo/links/ when you want it to be yoursite.com/seo/
5.) Create your primary pages: Now that you've set your permalinks it's time to decide on what will be included in your primary navigation bar and any site wide sidebars. This is a good time to breakout the Google keyword tool and run through some searches on what topics you will be covering the most. Test your assumptions and try to come up with at least five primary keywords for each category. Create these pages (even if you don't have all your content ready) and organize your navigation bar. On your blog you might want a secondary navigation bar that expands on the topics you will write posts on.
I always recommend creating the following pages which are considered fundamental on a legal and ethical level:
- Privacy Policy: A privacy policy is where you disclose if you have cookies on your site, what your doing with e-mail you collect and more. Here is a free template but I recommend doing more research specific to your site.
- Terms & Conditions: This describes how users are allowed to use your website. These vary based on what you include on your site (software, free downloads, etc.) so research what other people in your industry, topic are using.
- About/Contact: It builds user trust to know who runs the site and if they have a way to get in touch with them. This doesn't need to be long just a short bio and an e-mail or contact form will suffice.
- Disclosure: The FTC requires bloggers to disclose if they are getting paid or compensated in anyway for the content on their blog. Many use a disclosure page to go over what content is and is not sponsored or affiliate related.
6.) Set your home page: The WordPress default is to show your latest posts on the front page. If you'd like to have any kind of landing page for home and a blog section than do the following.
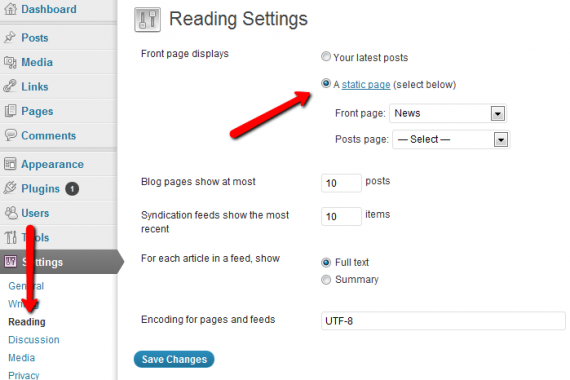
- Settings - > Reading: Choose a static page then select your desired home page from the drop down menu. Right below it you can select the page where you would like your blog posts to show up.
7.) Set your navigation menus and widgets: Now that you've created your pages you need them to show up on the page where you want. This is very specific to the theme you choose so I don't want to show visuals that could end up being contradictory. That being said, the general steps are:
- Dashboard ---> Appearance ---> Menus - From there you can add pages to your top navigation bar and put them in the order you want.
- Dashboard ---> Appearance ---> Widgets - This is generally where you would build your sidebars. You can have more than one sidebar on a page and you can customize what pages they will show up on. As I mentioned previously many sites only have a side bar on their blog page.
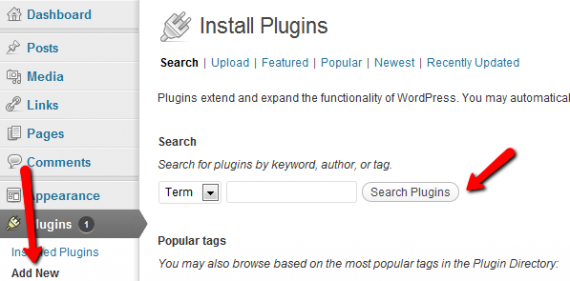
8.) Plugin's: Wordpress has a huge variety of plugins available to help you improve site functionality, SEO, collect e-mails and thousands of other things. The plugins I am recommending here are all free and can be found by going to Plugins ---> Add New and searching for the name.
- XML Sitemap Generator - Generates an XML Sitemap for better indexing of your site by the SERPS. This also makes it much easier to get your site setup in webmaster tools (Don't even consider not using this one)
- SEO Ultimate - Another plug-in you shouldn't go without even if your theme has solid SEO capabilities. This is the best all around SEO tool for Wordpress and its free. You can do everything from changing multiple title tags to editing your meta tag descriptions and adding pages to your robot.txt file.
- W3 Total Cache and W3 Super Cache - These can majorly improve your sites loading speed and greatly lower the risk of your site crashing from too much traffic.
- Broken Link Checker - Will notify you of broken links on your site.
- Permalink Trailing Slash Fixer - If you used my recommended permalinks structure this will add a trailing slash in the URLs if its missing.
9.) Google Analytics: For those that don't know, Google Analytics (or any other analytics service you might use) allows you to see how many visitors come to your site, what pages they visit, how long they stay and much much more. You may want to do add your analytics code earlier in the process but if you have a theme or plugin that can post your analytics code site wide then it's fine to wait until the rest of your site structure is setup. To register your site go to Google Analytics and they will walk you through the process.
10.) Webmaster Tools: Submit your site to Google and Bing Webmaster tools (which now covers Yahoo). They have solid instructions in both Bing and Google so I won't explain this step by step. Depending on the XML sitemap plugin you choose the instructions will also vary slightly. My only other point would be to do this as soon as your site structure is setup if you want the SERP's to start indexing your pages. I once forgot to do this for two months and couldn't figure out why a lot of my pages and links weren't showing up. The data you get from using these tools is also crucial.
Now you have your site setup. It's getting crawled by the search engines and feeding you data. The hard part comes next, you've gotta start posting! Blogging can be very competitive but if you have something interesting to say and you stick with it then good things will happen.
P.S. - I know I didn't cover how to setup your RSS feed or integrate with your social media (facebook, twitter, etc.). Although that stuff is important I didn't consider it fundamental in the first steps to getting a site up and running. Leave me some feedback and if anyone would like me to cover that I can come back with a separate post.
Follow me on Twitter!