What is the Data Layer?
The data layer is basically a vehicle to pass information from your website into a tag management system (TMS), such as Google Tag Manager (GTM), and pretty much anywhere you want after that. This blog post is to be a “Data Layer 101” if you will. Things we will cover include:
- What the data layer is
- How the data layer works
- How you can leverage your website’s data layer today
- Why you should setup and utilize the data layer
What is the Purpose of the Data Layer?
A Data Layer is a robust, reliable and structured way to track user information and website information (such as product ids and product prices). The Data Layer collects information on an event basis, meaning that information is only sent to your TMS if an event, such as a page load or a link click occurs.
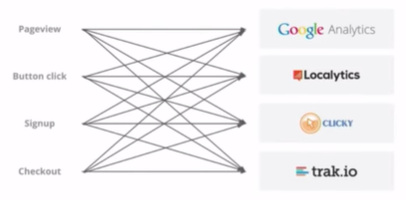
Example diagram without the data layer: Chaos!
How Does the Data Layer Store Information?
There are two methods for the data layer to collect data.
1) Hardcoded
This method is where a developer will install a snippet of code above the GTM snippet on your site defining exactly what data will populate the data layer. These are mostly used for populating the data layer on page load events.
Example snippet:
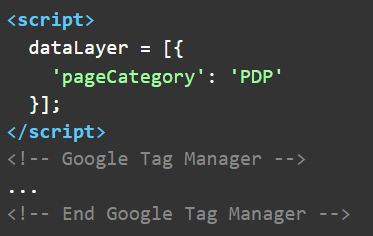
dataLayer.push is the recommended method for storing data in the data layer. Pushing to the data layer allows you to setup data layer pushes on events other than the page load.
2) Data Layer Push
Example push snippet:
![]()
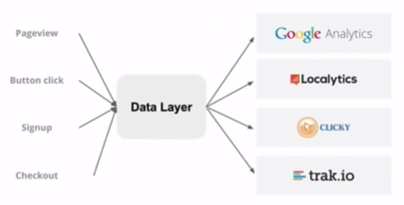
Example diagram with Data Layer: Much better!
How to Find the Data Layer
Let’s try to find the Seer Website’s data layer. There are a couple of ways to do this.
Viewing the Data Layer via Console
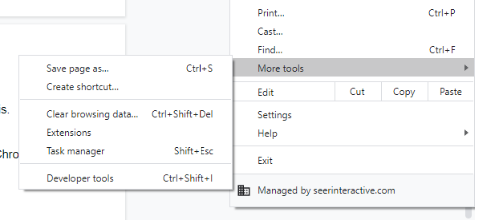
The console can be found within the developer tools of the Chrome browser. Navigate to the ellipses at the top right and select More tools then select Developer tools.
Select the console tab at the top of the developer tools pane. Then you can type in “dataLayer” in the search bar and select enter.
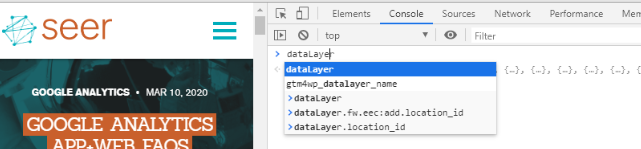
Once you hit enter you should see the data layer in all of its glory.
Data Layer via Console:
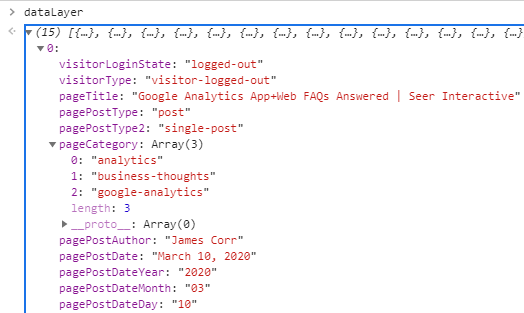
We can see that there have been 15 events. If we open up the information pane for the first event we can already see some of the data being passed to GTM via the data layer.
We know that we are on a blog post page titled "Google Analytics App+Web FAQs Answered | Seer Interactive". This particular post falls under the category of analytics, business thoughts and google analytics. This post was also published on March 20, 2020 by James Corr.
Look at all of the information we know and the page hasn’t even been loaded yet! Pretty cool stuff and you can see how that method of data collection can be extremely valuable for website tracking.
Viewing the Data Layer via GTM Preview
This method will only work if you have access to the GTM container that has been downloaded on the page already.
The first thing you will do is activate Preview Mode within your GTM workspace. For more information about how to do this, refer to our blog post titled "What is Google Tag Manager and What Does it do?" by Kevin Rutter. He details all about GTM and specifically the Preview function.
Once in Preview Mode, navigate to the site your container is installed on (in our case that is the Seer Interactive site).
GTM Preview Example:
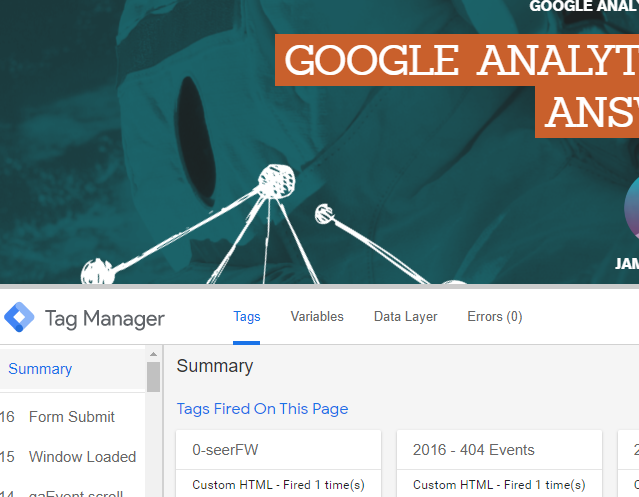
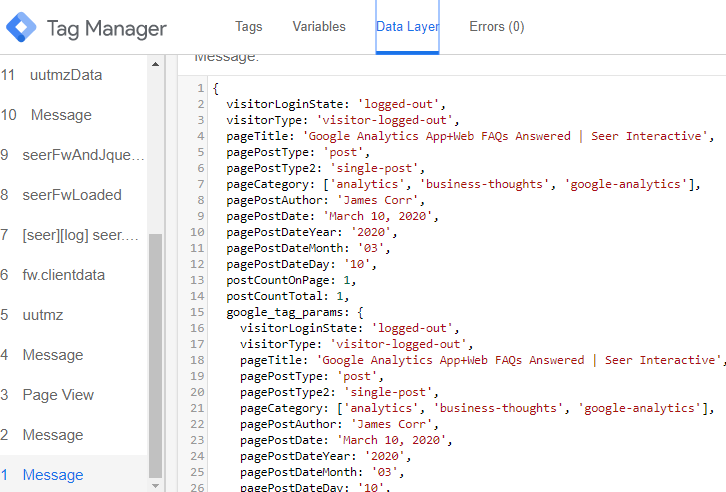
Navigate to the first event in the left scroll pane. Once you select that event, click the Data Layer tab at the top of the preview window. This displays the same data layer we saw in the console just a moment ago.
Data Layer via GTM Preview:
Turning Data Layer Values into Google Tag Manager Variables
Using the data in the data layer via GTM to populate your event tags and/or trigger your events is easy as well.
In fact, if you navigate over to the variable tab in the GTM preview window you can see some of these data layer values already being utilized through GTM variables.
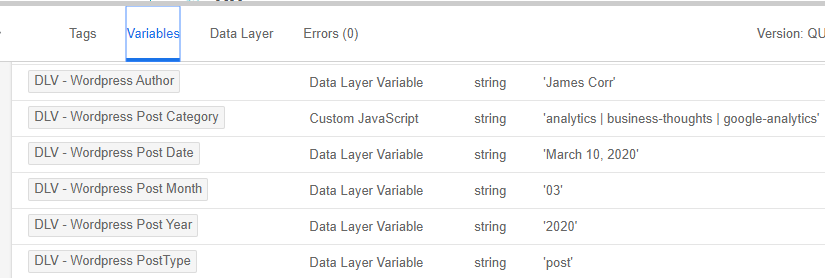
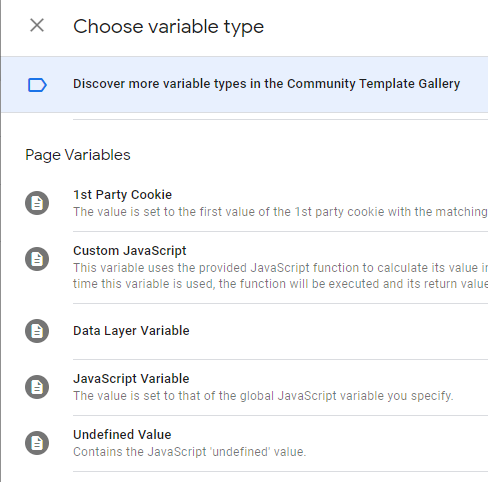
How to Create a Data Layer Variable in GTM
In GTM, create a new variable and select Data Layer Variable.
Next you will need to identify the data layer variable name for the value that you want to pull. In this case the variable name we want to pull is pagePostAuthor.
![]()
In the GTM Data Layer Variable we are creating, we simply enter pagePostAuthor.
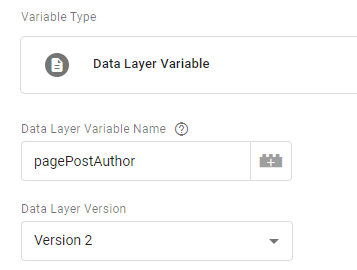
..and voila!
Now you can use that variable to pass along information via event tags or trigger events based on specific information being passed through this variable.
You Made it to the End!
I know I know, that was A LOT of information but you stuck it out and are now hopefully starting to get an idea about how the data layer functions and why you should setup and utilize a data layer for your website today. It is robust. It is reliable. And it is the preferred tracking method for most websites.
The data layer is a really difficult concept to master, in fact this post is more like the tip of the iceberg than the whole iceberg.
If you want to continue your data layer learning the following resources are good places to start:
Sign up for our newsletter for more posts like this - delivered straight to your inbox!